
+86-18018129592 / +86-18021275688

manager@meiganggroup.com

Inquire Now
+86-18018129592 / +86-18021275688
manager@meiganggroup.com
In the world of industrial machinery, few components are as critical and yet as overlooked as the gear coupling. This powerful, simple device is the workhorse of motion transfer, connecting two shafts to transmit torque and accommodate misalignment in everything from massive compressors and pumps to conveyors and fans. But like any hard-working component, it has a finite lifespan.
A failing gear coupling doesn’t just stop a machine; it can lead to catastrophic secondary damage to connected equipment like bearings, seals, and even the shafts themselves. The cost of unplanned downtime alone can be staggering. Therefore, knowing how to tell if a gear coupling needs replacement is an essential skill for maintenance technicians, plant managers, and engineers.
This guide will walk you through the visual, auditory, and performance-based signs of gear coupling failure, helping you diagnose problems early and schedule replacements proactively, before a minor issue becomes a major headache.
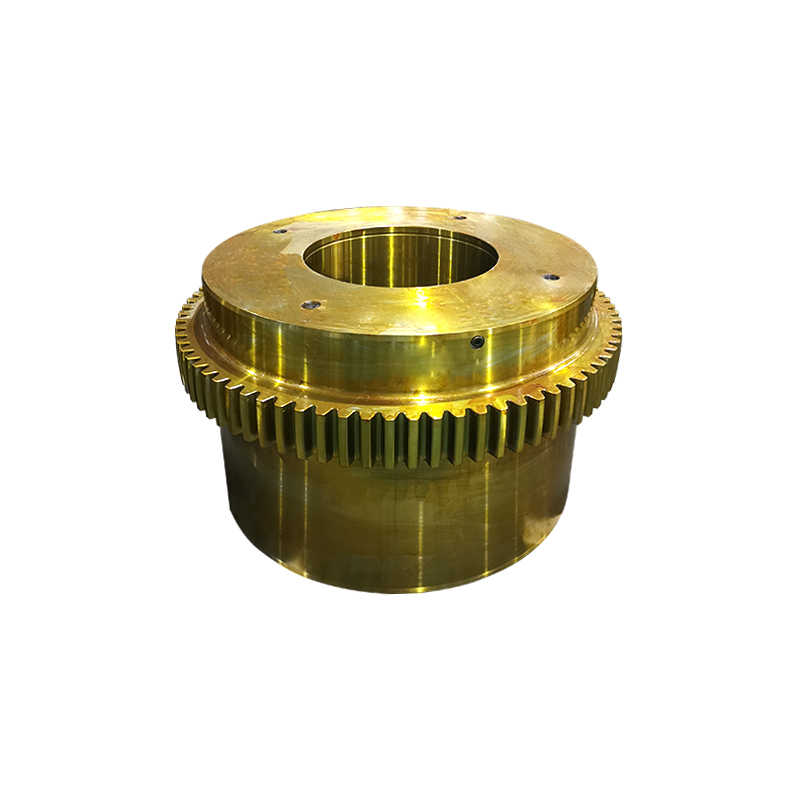
Before we diagnose problems, it’s helpful to understand the basic components. A typical gear coupling consists of two hubs (each with external gear teeth that fit onto a machine shaft) and a single or double sleeve (a hollow barrel with internal gear teeth that mesh with the hubs). The entire assembly is filled with lubricant and sealed with end caps or O-rings.
Their job is to:
Transmit Torque: Efficiently transfer rotational power from one shaft to another.
Accommodate Misalignment: Handle angular misalignment (shafts at a slight angle) and parallel offset (shafts not quite in line).
Allow for End Float: Accommodate slight axial movement of the shafts.
Understanding this design is key to diagnosing issues, as most symptoms of a bad gear coupling relate to the failure of these core functions.
You don’t always need sophisticated tools to spot a problem. Often, your senses are the best diagnostic instruments.
A regular visual inspection is your first line of defense. During routine maintenance rounds, check for these visual signs of coupling wear:
Lubricant Leakage: This is one of the most common signs. Grease or oil leaking from the end seals or the split in the sleeve indicates failed seals. A dry coupling will experience rapid, severe wear due to metal-on-metal contact and a lack of corrosion protection.
Rust and Corrosion: Visible rust on the sleeve, fasteners, or hub teeth is a major red flag. Corrosion breaks down the metal, leading to pitting and premature tooth failure. It often suggests the lubricant has broken down or moisture has ingress.
Cracks or Physical Damage: Inspect the sleeve carefully for any hairline cracks, especially around the bolt holes. A cracked coupling has already failed and is operating on borrowed time.
Freight-Train (Wear Pattern) Marking: During disassembly, examine the gear teeth. A slight wear pattern (a polished area in the center of the tooth) is normal. However, if you see heavy, concentrated wear at the tips or ends of the teeth, this indicates excessive misalignment. The pattern will show you exactly what kind of misalignment (angular or parallel) is present.
Component Movement: With the machinery locked out and tagged out (LOTO), try to check for movement. If you can feel any backlash or relative movement between the hub and sleeve that isn’t due to normal designed-in clearance, it points to severely worn teeth.
Your ears can often detect a problem before your eyes can see it.
Clicking or Popping Sounds: A rhythmic clicking or popping noise, especially during startup or under load, is a classic symptom of gear coupling failure. This is typically caused by worn or damaged teeth skipping over each other.
Vibration and Humming: A sudden increase in vibration or a new, persistent humming sound can be a sign of coupling imbalance (from a missing balance weight or severe wear) or misalignment, which the coupling can no longer properly absorb. This vibration transfers into the bearings and machine frames.
Scraping or Grinding: This is a serious sound that indicates a severe lack of lubrication. It means the metal teeth are grinding against each other, creating heat and causing rapid, destructive wear.
Excessive Heat: After safely stopping the equipment, carefully place your hand near the coupling. If it’s too hot to touch, it’s overheating. Causes include over-greasing (which churns the lubricant), under-greasing, high misalignment, or excessive wear—all creating friction.
Increased Power Consumption: A drive motor that is drawing more amps than usual for the same process load can be struggling against the increased friction and inefficiency of a failing coupling.
Product Contamination: In industries like food and beverage or pharmaceuticals, a leaking coupling lubricant can contaminate the product. This is an immediate and obvious reason for replacement with a sealing style appropriate for the environment.
A thorough inspection goes beyond a simple walk-by. Here’s a more detailed approach.
Step 1: Review Maintenance History
Check the last time the coupling was serviced or replaced. Compare this to the manufacturer’s recommended service life. Even a coupling that looks fine might be due for replacement based on hours of operation.
Step 2: Perform a Running Inspection
With all guards properly in place and while adhering to all safety protocols, observe the machine running. Listen for noises and look for any “wobble” or unnatural movement in the coupling sleeve.
Step 3: Shut Down and Lock Out
The only way to perform a true inspection is on a completely stopped, isolated, and locked-out machine.
Step 4: Check for Alignment
Use a reverse dial indicator or laser alignment tool to check the shaft alignment. Poor alignment is the number one killer of gear couplings. Even a new coupling will fail quickly if the shafts are misaligned. Document the alignment values.
Step 5: Open the Coupling
Remove the end seals or bolts to drain and inspect the lubricant. Look for metal particles (a fine grey paste is normal wear; large flakes or chunks are not).
Clean all the old lubricant out completely.
Visually inspect every tooth on both the hub and the sleeve. Use a bright light and a magnifying glass if necessary. Look for the wear patterns, pitting, scoring, and corrosion mentioned earlier.
Step 6: Measure Wear
For a precise assessment, use a gear tooth vernier caliper to measure the tooth thickness. Compare this to the original tooth thickness specifications from the manufacturer. Industry best practice suggests considering replacement if wear exceeds 5-10% of the original tooth thickness.
| Symptom | Probable Cause | Recommended Action |
| Lubricant Leak | Worn or damaged seals, over-greasing. | Replace seals, clean and re-lubricate with correct amount of specified grease. |
| Clicking/Popping Noise | Worn or damaged teeth, lack of lubrication. | Open, inspect, and likely replace the coupling. Check alignment. |
| Excessive Vibration | Imbalance (missing weights), severe wear, misalignment. | Check for missing balance weights, inspect for wear, verify shaft alignment. |
| Overheating | Over-lubrication, under-lubrication, high misalignment. | Verify correct lubrication procedure and quantity. Check alignment. |
| Rust/Corrosion | Water ingress, improper lubricant, failed seals. | Replace coupling. Address the source of moisture and use a corrosion-inhibitive lubricant. |
Gear couplings are generally not repaired in the field. While you can replace seals and re-lubricate, the core components (hubs and sleeve) are sold as a matched set. If the inspection reveals significant wear on any component, the entire coupling set must be replaced.
Trying to mix a new sleeve with old, worn hubs (or vice-versa) will lead to immediate and accelerated wear because the gear teeth will not mesh correctly. Mismatching components is a false economy that guarantees a rapid second failure.
When in doubt, replace the entire coupling assembly. The cost of the part is negligible compared to the cost of unexpected downtime and damaged equipment.
The best way to tell if a gear coupling needs replacement is to never be surprised. A proactive maintenance program is key.
Establish a Schedule: Base your inspection intervals on the criticality of the machine and its operating environment (e.g., every 3-6 months for a critical pump).
Alignment is Everything: Precisely align all connected equipment during installation and after any maintenance that might disturb the baseplate or shafts.
Proper Lubrication: Use the manufacturer-recommended type and quantity of lubricant. Over-greasing can be as harmful as under-greasing, as it creates heat and can blow out seals.
Keep Records: Log every inspection, alignment check, and lubrication event. This history will help you predict the lifespan of your couplings and plan replacements during planned shutdowns.
A gear coupling is a deceptively simple component that plays an outsized role in the reliability of your rotating equipment. By learning to recognize the signs of coupling wear—from leaks and rust to noises and heat—you shift your maintenance strategy from reactive to proactive.
Regular visual and auditory checks, combined with scheduled shutdown inspections, will provide all the evidence you need to answer the question, “Does this gear coupling need replacement?” Catching these signs early allows you to plan, source parts, and execute the repair on your schedule, ensuring maximum uptime, protecting your valuable assets, and maintaining a smooth, efficient operation.

We have a strong R&D team, and we can develop and produce products according to the drawings or...

We have two of our own casting foundries and one CNC machining factory. So we can offer the best price...

We have our own testing lab and the advanced and complete inspection equipment, which can...

+86-18018129592
+86-18021275688

manager@meiganggroup.com
sales_001@meiganggroup.com
sales_002@meiganggroup.com
© 2024 SUZHOU MEIGANG ENG TECH LIMITED All rights reserved. China Integrated Metallurgical Equipment Manufacturer

 English
 русский


